
Imagine having an old HP LaserJet gathering dust on the table. Why? I upgraded my laptop but not the printer. Does that mean I have to go buy a new one? Absolutely not! But what should I do?
I opened my drawer and found my Raspberry Pi 2 from college days, along with a Wi-Fi dongle.
I reached out to my friend Claude to seek guidance.
Claude said, “Absolutely, my friend — let’s build a print server on the Raspberry Pi 2.”
What followed wasn’t quite the smooth ride either of us expected — stuck print jobs, mismatched drivers, and a little bit of debugging to get things running. But we got there, and this post is the trail we left behind so you don’t have to retrace our steps.
The Hardware
- A Raspberry Pi with SD card (Pi2 I used for this)
- An old printer (HP LaserJet 1018)
- USB cable to connect the printer to the Pi
- Wi-Fi dongle
- Local Network
Step 1: Flash OS on microSD card
- Use official Raspberrypi Imager to install Raspberry Pi OS to microSD card.
- Connect microSD card to the laptop/device from where you want to run the imager.
- Configure the details as requested in Raspberry Pi Imager.
- Select Raspberry Pi OS Lite 32-bit under OS section.
- Select the microSD card under storage.
- Enable SSH to enable remote connection from any other system.
- Configure the WiFi details with SSID, username, and password.
- Configure the hostname or leave default hostname as
raspberrypi. - Finally let the imager write the files to the SD card.
- After the image is written and verified, Imager shows the Done tab. Select Finish to exit Imager.
Step 2: Boot the Raspberry Pi and update
- Install the microSD card into the Raspberry Pi and boot the Pi.
- SSH into the Raspberry Pi from another system.
ssh <username>@raspberrypi
- Enter the password when prompted.
- Update the Pi by running the command below.
sudo apt update && sudo apt upgrade -y
Step 3: Install CUPS (the print server software)
sudo apt install cups -y
sudo usermod -aG lpadmin pi
lpadmin group membership lets your user manage printers without needing full root access every time.
Step 4: Install the HP Driver Suite (HPLIP)
I initially looked at a third-party driver package (foo2zjs) for this, as suggested by Claude, since it’s commonly recommended for the 1018/1020 family.
But it didn’t work. I did some research with my friend and Google. Then I figured out I should use HPLIP instead.
In practice, HPLIP ended up being what actually worked on this setup:
sudo apt install hplip -y
sudo hp-setup -i
Follow the prompts in hp-setup to detect and configure the connected printer.
Note: If you go looking for
foo2zjs, be aware it’s not available as an apt package on newer Raspberry Pi OS versions.
In case printer stops working, try reinstalling the drivers using hp-setup. In most of the cases, it works!!!
Step 5: Open Up CUPS for Remote Web Admin
By default, CUPS only listens on localhost, and its admin pages are locked down. To manage it from any browser on your network, edit the config:
sudo nano /etc/cups/cupsd.conf
Make the following changes:
Port 631
WebInterface Yes
DefaultEncryption IfRequested
Browsing On
BrowseLocalProtocols dnssd
And under each of <Location />, <Location /admin>, and <Location /jobs>, add:
Allow @LOCAL
so each block looks like:
<Location /admin>
  Order allow,deny
  Allow @LOCAL
</Location>
Restart CUPS to apply:
sudo systemctl restart cups
For Mac/Bonjour auto-discovery, install Avahi:
sudo apt install avahi-daemon avahi-utils -y
sudo systemctl enable --now avahi-daemon
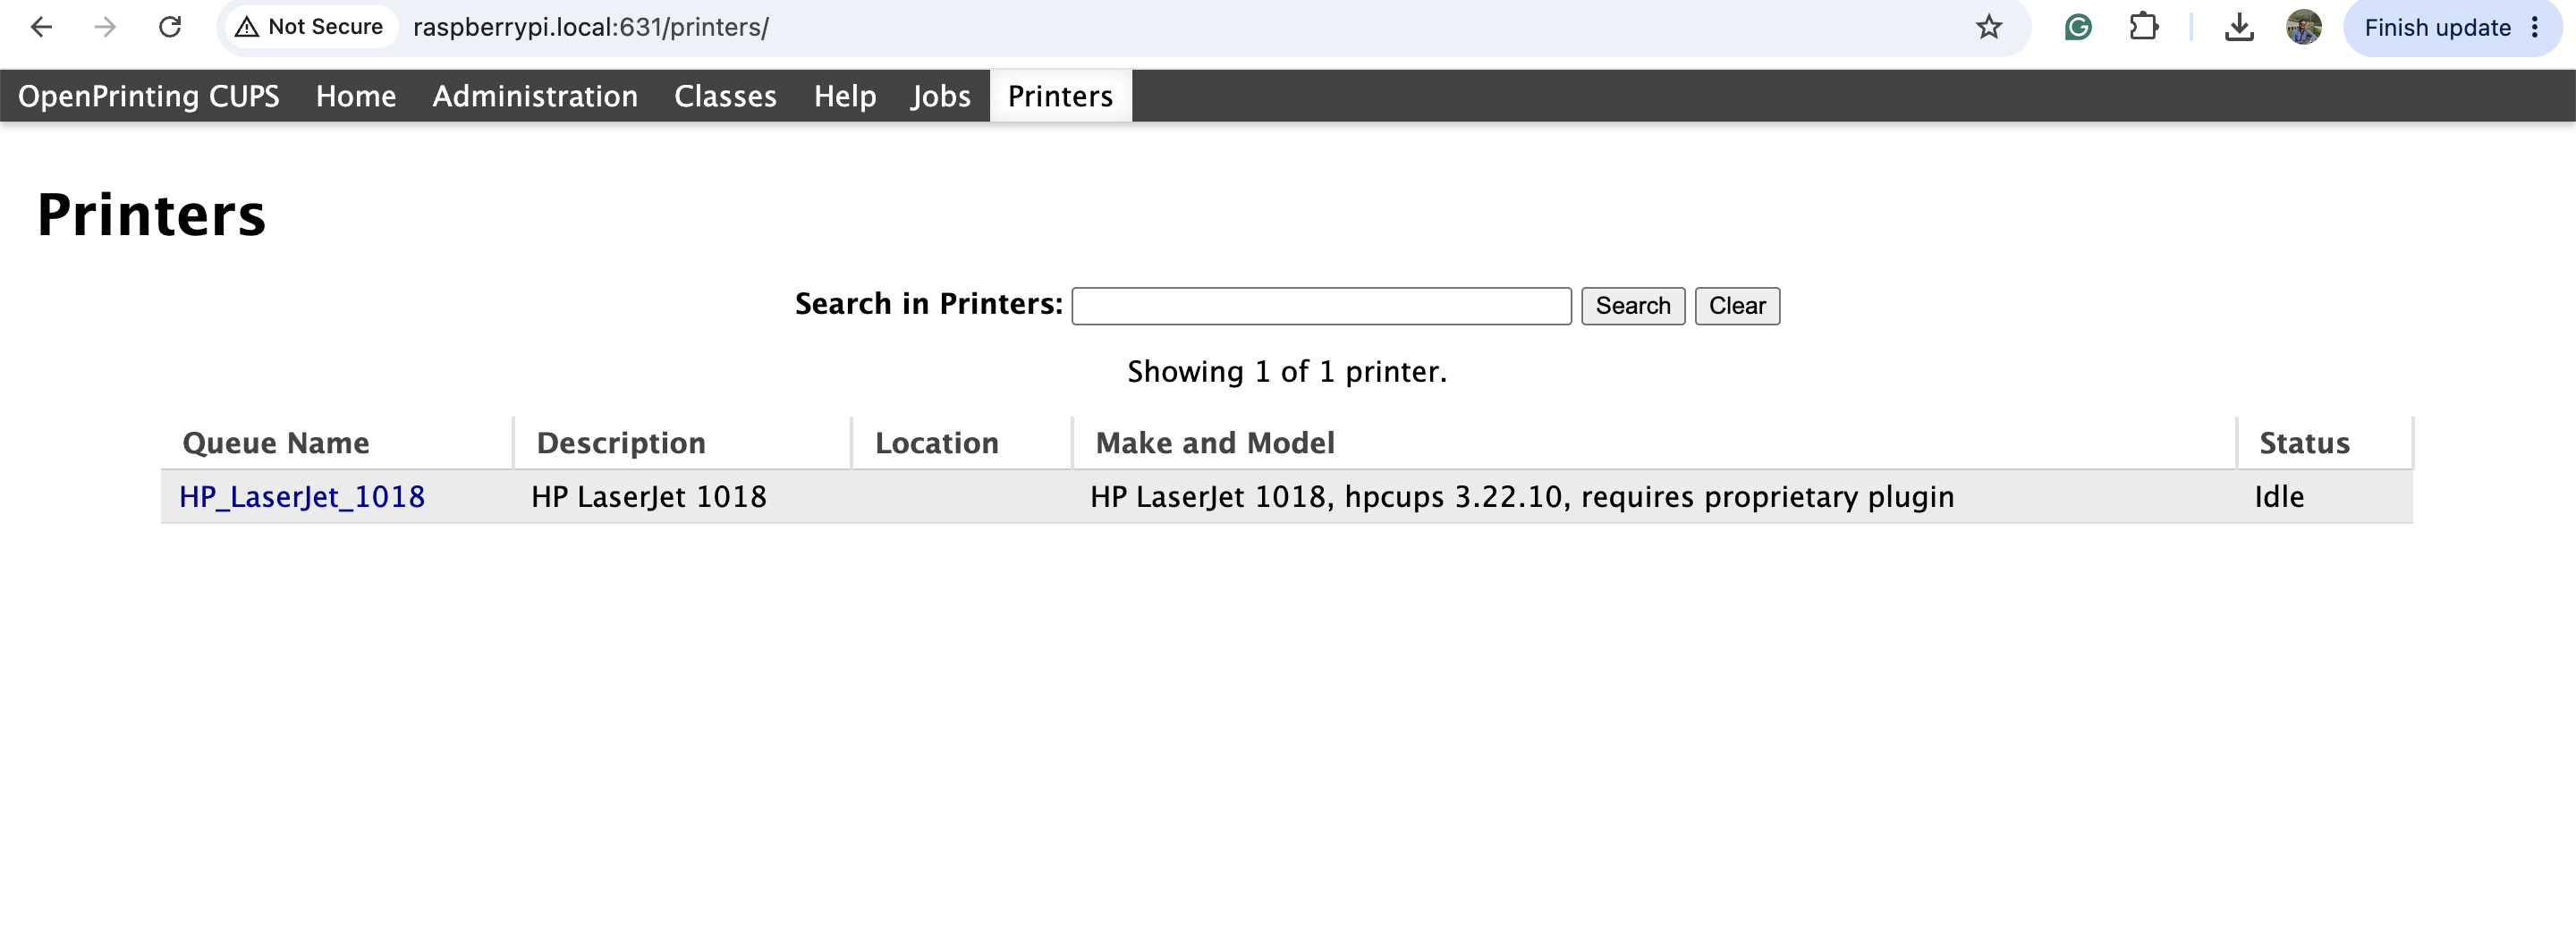
Step 6: Add the Printer via the CUPS Web Interface
From any browser on your network:
(Accept the self-signed certificate warning — this is normal for local CUPS installs.)
- Go to Administration → Add Printer
- Log in with your Pi’s username/password
- Select the LaserJet 1018 (should appear as a local USB device)
- Choose the matching driver from the list
Finally, make sure “Share This Printer” is checked on the printer’s settings page in the CUPS web interface.
Connecting Client Devices
macOS
System Settings → Printers & Scanners → Add Printer. It should auto-discover via Bonjour, thanks to Avahi.
Windows
Add Printer → “The printer that I want isn’t listed” → add via URL:
http://raspberrypi.local:631/printers/HP_LaserJet_1018
Final Thoughts
Getting an old “incompatible” printer working again through a Raspberry Pi is very achievable, but the actual driver that ends up working may not be the one most commonly recommended online (foo2zjs, in my case) — HPLIP’s own hpcups driver did the job here instead. Always verify what’s actually active in your PPD file rather than assuming.
The end result: an old, college-era IoT device — the Raspberry Pi 2 — keeping a perfectly good LaserJet alive for years to come, printable from every device in the house.
The Pi brought old and new devices together with a legacy printer.